Protocol remodeling structures#
Since the new version PyMOL 2.5 there are new functions concerning the builder. Now also already existing structures can be extended with bases. If you want to use this builder function the PDB file must have the following formatting:
ATOM 2 C5' G A 21 182.717 147.235 253.047 1.00 0.00 A C
It is important to specify the letter for the chain and the segment identifier. Another useful function of the Builder is to create bonds. Thus, different structure fragments can be joined together. This is needed for the remodeling in this example.
To show how to create a bound model of the KL-TLGAAA and how the knowledge-based structure assembly works, we created the following step-by-step guide. We also show, how to use this approach at a already existing PDB structure.
Modeling a bound KL-TLGAAA:#
Step 1: Align template and model#
Steps
Reduce the template structure (here: 3JCT) to the bases to be considered.
Load the Rosetta model and create an object of the KL region of model and template structure.
Align the kissing loop of the model (mobile selection) to the kissing loop of the template (target selection). (Use the alignment plugin from PyMOL).
Align the entire structure of the model (mobile selection) to the aligned kissing loop of the model (target selection).
Step 2: Tetraloop mapping#
Steps
Create an object for each tetraloop (model and template)
Align the tetraloop of the model (mobile selection) to the tetraloop of the template (target selection).
Remove the TL and the poly-A linker of the complete model structure.
Export the aligned KL and TL without poly-A-linkers of the model as new molecule.
Step 3: modeling a poly-A-linker#
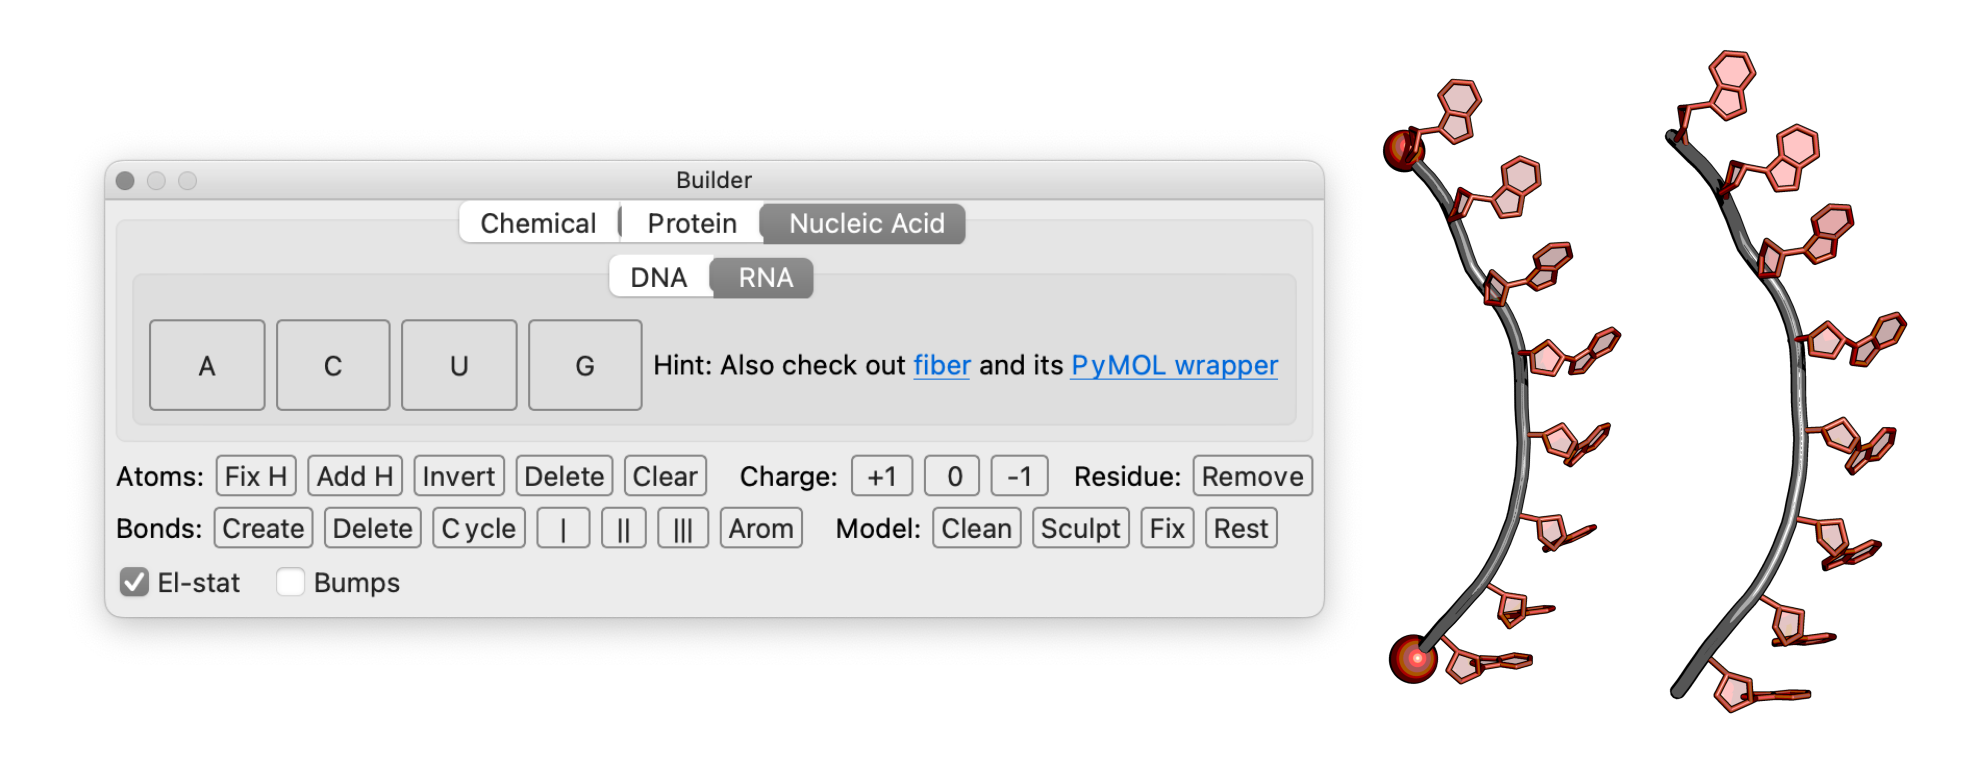
Steps
Open the PyMOL Builder and select “Nucleic Acid” and “RNA”.
Click on the A button and select “Create as new object” in the PyMOL window.
Click on the orange or red sphere on the adenine in the PyMOL window to add a new base.
The helix-like structure can be resolved by twisting the bases at the backbone. To do so, set the PyMOL window to editing mode and press ⇧ shift on a bond. With presses command key, the bases can then be rotated at the bonds.
When the desired shape is ready, the poly-A linker can be exported as a molecule.
Step 4: Attaching the Poly-A linker#
Steps
Load the created poly-A-linker and the structure model together in one PyMOL window.
Move the poly-A-linker in editing mode to the position where the Poly A linker should be attached.
In the PyMOL Builder, click on the Create button under Bonds and then click on one end of the structural model and the corresponding end of the poly-A-linker. A continuous structure should be visible.
Export the resulting molecule and check whether the bases of the poly-A-linker are in the correct position in the document. If this is not the case, then the lines should be moved to the right place in the PDB file. When doing this, the residue numbers should also be adjusted.
Now the structure is equilibrated with a short (1ns) MD simulation so that the bonds align and the structure is optimized.
Known pitfalls:
Make sure that the PDB format of the structural model and poly-A linker have the same format.
During remodeling, the model is moved far away from the origin in the PyMOL coordinate system. This may end up making the simulation box too large. Relocate the structure near the coordinate origin if necessary.
Watch out for “TER” identifiers in the PDB file and remove them before a simulation otherwise strand breaks may occur.
Make sure that all bases are present. If necessary, check the number of bases in the PDB format. Residue numbers are irrelevant. Count!